


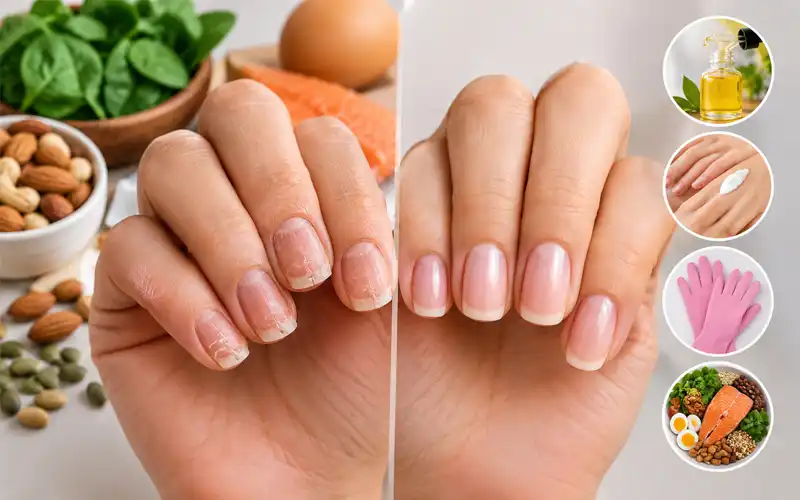
Weak nails are frustrating. One day your hands look fine, and the next day a corner peels, a tip splits, or a whole nail snaps while you open a simple packet. If that sounds familiar, you are not alone, and the good news is that most weak nails can be repaired with patience and the right care. The short answer: shield your nails from water and rough handling, add moisture every day, eat enough protein and iron, and give the damaged part time to grow out.
This guide shows you how to fix weak nails step by step, from quick rescue moves to a daily routine that is easy to follow. You will also learn what to do after gel or acrylics, which natural remedies are worth trying at home, and which food gaps can quietly hold your nails back. Everything is written in simple language, so you can start today.
Signs Your Nails Are Losing Strength
Healthy nails are smooth and slightly flexible. Weak nails give clear warnings, and spotting them early can save you months of repair.
Peeling Layers at the Tips
When the top layer of the nail lifts away in thin sheets, the nail plate has dried out and lost its natural bond. It usually starts at the free edge and slowly creeps upward if you leave it alone. Peeling nails often feel rough and catch on clothing, which makes the problem worse.
Bendy and Paper-Thin Nails
Some nails feel soft and fold over under the lightest pressure. They rarely snap, but they bend, tear, and curl, which makes everyday jobs like typing or buttoning a shirt uncomfortable. These nails usually need more moisture and gentler handling.
Snapping or Ridged Surfaces
Other nails are hard but brittle. They crack straight across or split down into the nail bed without any warning. You may also notice rough ridges or deep vertical lines on the surface. Knowing which type you have helps you pick the right fix later in this guide.

Peeling, bending, and splitting are common signs that your nails may be weak and need extra care.
What Really Weakens Your Nails
Weak nails rarely come from one big mistake. Usually, a few small habits add up over weeks and months until the nail finally gives in.
Constant Wetting and Harsh Cleaners
Nails soak up water and swell, then shrink again as they dry. Repeating this cycle through dishwashing, long showers, and frequent handwashing creates tiny cracks between the nail layers. Strong detergents and bleach make things worse by stripping away the natural oils that keep nails flexible.
Rough Filing and Heavy Buffing
A coarse file, sawing motions, and pressing too hard all thin the nail plate over time. Buffing the surface until it shines removes even more of the top layers, and nails that have lost those layers split far more easily. This kind of damage is quiet, so it often shows up only days later.
Weather Changes and Age
Cold, dry air pulls moisture out of both skin and nails, which is why splitting often increases in winter. Age plays a part too, because nails become drier and more fragile over the years. These changes are normal, but good care can soften their effect a lot. Food gaps and health conditions can also be behind weak nails, and you will find those in their own sections below.
Fast Rescue When Nails Feel Fragile
Do not expect a miracle overnight, because nails grow slowly. Still, a few quick moves can protect them right away and stop the damage from spreading. If you want to know how to fix weak nails fast, begin with these two moves.
Overnight Oil and Glove Method
If you want to strengthen nails overnight, this simple deep moisture treatment is the best place to start. Before bed, spread a thick, fragrance-free balm over each nail and the skin around it, then slip on soft cotton gloves. By morning your nails feel smoother and more flexible, which lowers the chance of breaking during the next day.
Trim the Damaged Edge
A split that is left alone usually tears deeper. Trim the cracked part with clean clippers using small cuts, then smooth the corner with a fine file. Removing the weak edge is one of the quickest ways to stop a nail from snagging on clothes and breaking further down.
Easy Routine to Fix Weak Nails
This is the heart of the plan. Follow these six steps in order, and repeat them daily where it makes sense. The whole routine takes less than ten minutes.
Cleanse and Check Each Nail
Start with clean, dry hands and remove any old polish so you can see the bare nail. Look closely at every nail for peeling, cracks, or soreness around the edges. This quick check tells you where to be extra careful during the rest of the routine and helps you notice any change over time.
Shape with a Gentle File
Use a fine-grit file and move it in one direction only, from the side toward the center. Never saw back and forth, and avoid pressing hard over thin spots. Your goal is a smooth edge that will not snag, not a thinner nail. Replace a worn file when its surface feels rough.
Massage in Cuticle Oil
Place a small drop of cuticle oil on each nail and massage it into the cuticle and sidewalls for about thirty seconds. Oils with jojoba or vitamin E sink in quickly and keep the nail plate flexible. Use it once or twice a day, and wipe the surface before applying any polish.
Seal with Hand Cream
Oil conditions the nail itself, while cream locks moisture into the skin around it. Smooth a nourishing hand cream over your fingers and fingertips, especially after washing your hands. Creams with shea butter or glycerin work well and keep the skin around the nail from cracking.
Protect Using a Flexible Base Coat
Apply one thin coat of a strengthening or conditioning base coat. Look for a flexible formula, and follow the label for how often to remove and reapply it. Layering several treatments can leave a thick, stiff film that chips unevenly, so stay with one product at a time.
Wear Gloves for Wet Chores
Slip on gloves for dishes, cleaning, and laundry, and dry your hands fully afterwards, including under the nail tips. This one habit protects every earlier step from being washed away. Choose gloves with a soft cotton lining if rubber irritates your skin.
Weekly Rhythm to Keep
Once the steps feel natural, spread them across the week so nothing feels like a chore. Every day, finish with the oil, the cream, and the gloves from Steps 3, 4, and 6. Twice a week, add one of the home treatments from the remedies section below.
Once a week, run a fingertip along each nail edge and use Step 2 only where you feel a snag. Small, steady effort beats a long session that you cannot keep up.
Matching the Fix to Your Nail Type
Not every weak nail needs the same emphasis. The routine above suits both types, but a few small shifts help each one recover faster.
For bendy and peeling nails, double down on moisture: use the oil at the higher end of its range and add a warm soak from the remedies section twice a week. For hard and snapping nails, lean on the softening oil soaks and handle them gently through the day.
If you are not sure which type you have, treat your nails as bendy first and watch how they respond over two weeks.
Healing Nails After Gel Polish
Gel looks great, but removal often pulls away layers of the natural nail. If you are wondering how to fix weak nails after gel, the plan is simple: remove carefully, rest, and then rebuild.
Remove Gel Without Prying
Never peel or scrape lifted gel, because it takes thin layers of your own nail with it. Lightly buff the shiny top, soak cotton pads in remover, wrap each fingertip, and wait until the gel softens and slides off. Rushing this step is the main reason nails feel thin and bendy afterwards.
Rest Before the Next Set
Give your nails two to three weeks without gel so they can recover. During that time, keep up your daily routine and let the surface smooth out on its own. You will usually feel the difference first in the flexibility of the nail tips, which is a good sign that the repair is working.
Rebuild with Repair Treatments
After the break, a keratin-based or ridge-filling treatment can help new nail grow back sturdier. Use it exactly as the label directs, and do not jump straight into a full set of gel again. Returning slowly keeps the progress you worked for. When you do go back to gel, rub sunscreen over your hands about 20 minutes before the UV lamp, because repeated lamp exposure can age the skin around the nail.
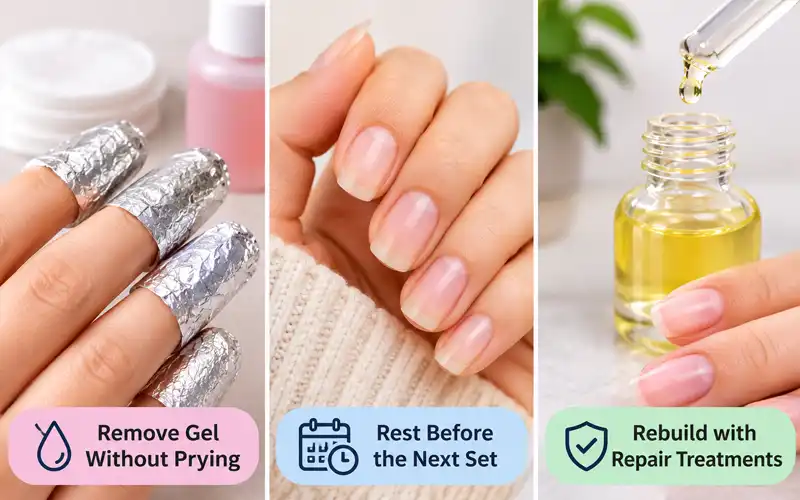
Three steps to recover weak nails after gel polish: remove gel gently, give nails time to rest, and use nourishing repair treatments.
Repairing Nails After Acrylics
Acrylics add strength from the outside but often leave the natural nail thin and sore underneath. To fix weak nails after acrylics, patience matters more than any single product.
Soak Off Instead of Pulling
Pulling or prying acrylics rips off the top layers of your own nail. Ask a nail technician to soak them off, or clip them short and soak the remaining product as the remover instructions say. Afterwards, rinse your hands and apply a little cuticle oil, because soaking leaves the nails very dry.
Go Easy on Leftover Glue
Sticky glue residue can stay on the nail after removal. Do not scrub or scrape it away. Instead, dab a little oil on the spot several times a day and let it lift naturally as the nail grows. Scraping it off risks taking healthy nail with it.
Wait Before Booking Again
Acrylics usually involve heavier filing, so give your nails a longer pause than you would after gel, ideally a month or more. Use that time to watch how they behave. When they stop bending and peeling, you can calmly decide whether you want another set.
Natural Remedies for Weak Nails at Home
Kitchen oils will not rebuild a damaged nail, but they add moisture and flexibility. If you prefer to fix weak nails naturally at home, these home remedies are simple and affordable. Test a small patch of skin first, and stop if you notice any irritation.
Olive Oil Warm Soak
Warm a few spoons of olive oil until it feels comfortably warm, not hot, and soak your fingertips for about ten minutes. Pat off the extra and let your hands rest. Doing this two or three times a week keeps dry, peeling nails soft and easier to manage.
Coconut Oil and Honey Mask
Stir one teaspoon of coconut oil with half a teaspoon of honey, spread it over your nails and cuticles, and leave it on for about ten minutes. Honey draws moisture in and coconut oil seals it, so peeling edges often feel softer afterwards. Wipe it off with a damp cloth.
Vitamin E Capsule Rub
Pierce a vitamin E capsule and rub the oil over the nail and surrounding skin. It is rich and conditioning, which makes it especially helpful for dry, rough cuticles. Use it a few times a week rather than daily, since the thick texture can feel heavy.
Castor and Almond Oil Blend
Mix equal parts castor oil and sweet almond oil in a small bottle. Castor oil is thick and almond oil is light, so the blend spreads easily and stays on longer. Use a drop on each nail in the evening, and shake the bottle gently before each use.
Food and Vitamins Behind Brittle Nails
Nails are built mostly from protein, so what you eat shows up at your fingertips. Many people search for brittle nails vitamin deficiency answers, but a shortage is only one possible cause, so avoid guessing.
Iron and Zinc Gaps
Low iron can leave nails thin, pale, or even scooped, and low zinc may slow nail growth. Spinach, lentils, chickpeas, pumpkin seeds, and red meat are good sources. Squeezing lemon over iron-rich meals helps your body absorb more of the iron.
Protein and Collagen Foods
Because nails are made of keratin, a diet low in protein can leave them weak. Include eggs, fish, chicken, beans, yogurt, and nuts in your regular meals. Some people also add collagen powder, but whole foods remain the best starting point for steady nail growth.
Biotin and B Vitamins
Biotin is the best-known nail vitamin, and some small studies suggest it may help brittle nails, though strong proof is limited. Eggs, nuts, and seeds supply it naturally. Vitamin B12, found in eggs, dairy, and fish, can run low in people who eat few animal foods, and a shortage may show up in the nails. Tell your doctor if you take high-dose biotin, because it can interfere with certain lab test results.
Signals That Point to Deficiency
Clues beyond the nails include constant tiredness, thinning hair, pale skin, or frequent mouth sores. If several of these appear together, ask your doctor for a simple blood test instead of buying random supplements.
Habits That Protect Nails Daily
Small daily choices decide whether your repair work lasts or fades away.
Fingertips Instead of Nails
Use the pads of your fingers, a spoon edge, or a small tool to open packets, lift lids, and scratch off labels. Your nails are not tools, and one sharp twist can undo weeks of progress in a single second.
Hand Sanitizer and Washing Water
Alcohol-based sanitizer dries nails quickly, so keep it mostly on your palms and let it dry fully before you touch your nails. When you wash your hands, use lukewarm water instead of hot, because hot water strips moisture from the skin and nails faster.
Short, Rounded Shape Wins
Long, square nails catch on fabric and take more impact. A short, softly rounded shape spreads pressure evenly, so there are fewer breaks while the nail recovers. Keep the length manageable until your nails feel steady and strong.
Slip-Ups That Undo Your Progress
Biting your nails or picking at the skin around them tears tiny pieces from the nail fold, and it often leads to painful hangnails. Digging under the tip with a sharp metal tool does similar harm by lifting the nail away from its bed.
Cutting your cuticles removes the seal that protects the nail root, so only trim a hanging piece of dead skin and leave the rest alone. Jumping between new products every few days is another trap, because your nails never get a fair chance to show what actually works.
When Weak Nails Need a Doctor
Most weak nails improve with steady care, but some need professional help. See a doctor if a nail hurts, bleeds, lifts from the nail bed, changes color or shape suddenly, or shows a dark streak you cannot explain.
Conditions such as thyroid problems and fungal infections can show up in the nails. If several weeks of steady care bring no change, a dermatologist can review your routine and health history and suggest stronger treatments.
Recovery Timeline to Expect
Nails grow about 3 mm per month, so a full nail usually takes around three to six months to grow out. Here is a realistic picture of what to expect along the way.
In the first two to four weeks, you may notice fewer rough edges and less peeling. By the second and third month, nails bend less and break less often. After four to six months, the healthier nail reaches the tip, and that is when real strength shows. Take a photo of your hands once a month, since small improvements are easy to miss.
FAQs
Are Nail Hardeners Safe?
Hardeners with strong chemicals can make nails stiff and more likely to snap if you use them too often. Gentler strengtheners that keep some flexibility are usually a better daily choice, especially for brittle nails.
Is Polish Okay While Healing?
Yes, in moderation. One thin color coat over a base coat is fine, as long as you remove it gently with an acetone-free remover and never pick at it.
Can Nails Return to Normal?
Yes. Once the cause is removed, new nail grows in healthier and pushes the damaged part toward the tip. A split that already exists will not heal itself, but it moves out with growth.
Does Drinking Water Help?
Drinking enough fluids supports your whole body, including your nails, but water alone will not repair damage that came from the outside. It works best as a helper to the moisture you add with your routine, so keep sipping regularly through the day.
Do Nails Need to Breathe?
Not really. Nails get what they need from the blood supply under the skin, not from the air, so polish does not suffocate them. The real reasons for a pause are to check the nail surface, let it rehydrate, and avoid the wear of repeated removal.
Why Do White Spots Appear?
White spots usually come from small knocks to the nail base while it is forming, not from a calcium shortage as many people believe. They are usually harmless and simply grow out with the nail.
Should I Use Super Glue on a Crack?
No. Household super glue is not made for nails and can irritate the skin and make removal harsh. For a crack too deep to trim away, use a glue made for nails or a nail repair patch, and ask a technician if the crack runs close to the skin.
Conclusion
Fixing weak nails is a slow job, but it is not a hard one. Stay patient, enjoy the small wins along the way, and keep this routine as a habit rather than a quick fix. Healthy, smooth nails are well within reach.
Also Read : How to Remove Gel Nail Polish at Home Without Damaging Your Nails