


Blush can add warmth, color, and dimension to your makeup, but where you apply it can change the overall effect. On a round face, placing blush along the upper cheekbones and blending it toward the temples can create a soft, lifted appearance. The goal is not to hide your natural face shape but to choose a placement that complements your features and suits your preferred makeup style.
The best blush placement for round face depends on your cheekbones, skin type, makeup formula, and the look you want to achieve. Higher placement can add definition, while a softer flush closer to the center of the cheeks creates a fresh, youthful effect. With the right shade, a suitable brush, and controlled application, you can create either look without making your makeup appear heavy.
This guide explains how to apply blush step by step, choose the right formula and shade, combine blush with contour or bronzer, and adjust your technique for different facial features. You will also learn how to correct common mistakes and help your blush last longer.
Step-by-Step Guide to Applying Blush
A good blush application starts with choosing the right placement before adding color. Rather than covering the entire cheek, focus on the area that creates your preferred effect and adjust the intensity as you go.
Step 1: Prepare Your Skin and Base Makeup
Begin with clean, moisturized skin. Give your skincare products time to settle before applying foundation, concealer, or other base makeup. If your skin feels slippery or your foundation is still wet, blush may move around instead of blending evenly.
Consider your blush formula when preparing your base. Liquid and cream blushes usually blend well over compatible liquid or cream products, while powder blush often works best after your base has settled. If you use setting powder, apply it evenly so the blush does not cling to dry patches or areas with excess product.
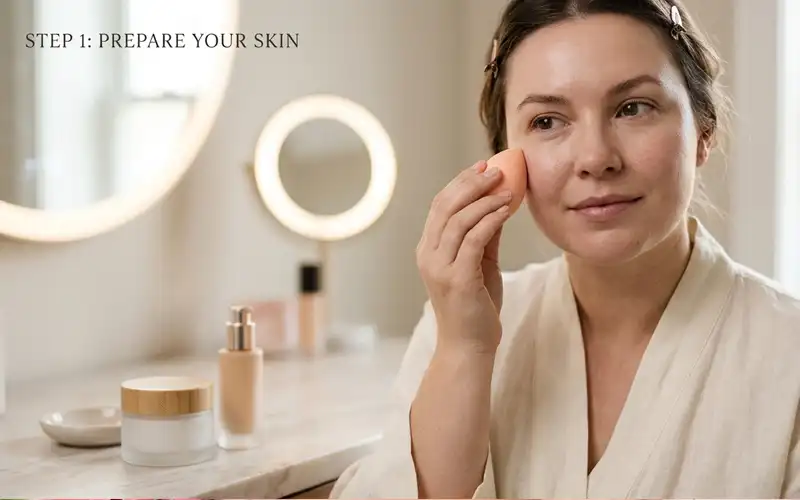
Start with moisturized skin and an even makeup base to help blush blend smoothly.
Step 2: Locate Your Upper Cheekbone
Look straight into a mirror and identify the area just above your cheekbone. For a lifted effect, begin around the outer half of the cheek, leaving some space between the blush and the sides of your nose.
A useful guide is to imagine a diagonal line extending from the outer cheek toward the temple. You do not need to follow a strict angle or place the color at the exact same height on both sides. Your cheekbone structure and natural facial proportions should guide the final placement.

Identify the upper cheekbone and follow a gentle diagonal direction toward the temple for a lifted effect.
Step 3: Apply a Small Amount of Blush
Pick up a little product using a brush, sponge, or the applicator supplied with your blush. For liquid or cream formulas, begin with one small dot on each cheek. For powder blush, lightly tap the brush to remove excess product before touching your skin.
Place the color along the upper cheek area you identified earlier. Avoid applying too much at once, particularly if the formula is highly pigmented. Starting with a sheer layer gives you more control and makes it easier to achieve an even finish.

Begin with a small amount of blush on each upper cheek and build the color gradually.
Step 4: Blend Toward the Temples
Use gentle, short strokes to move the color outward and slightly upward. A fluffy brush works well for diffusing powder blush, while a small, soft brush offers greater control over cream or liquid formulas. You can also use a damp makeup sponge to press and soften the edges.
Keep the most visible color near the upper cheekbone, gradually reducing its intensity toward the temples. Avoid creating a sharp stripe or blending the blush so far outward that it disappears into the hairline. The edges should look soft, with no obvious line separating the blush from your foundation.

Blend with gentle upward and outward strokes, keeping the strongest color near the upper cheekbone.
Step 5: Check the Shape and Intensity
Check both cheeks from the front and at a slight angle. Look for uneven color, harsh edges, or one cheek appearing noticeably stronger than the other. Natural daylight can help you judge the result more accurately than strong bathroom lighting.
If the blush looks too intense, soften it with a clean brush or gently press a sponge over the area. If one cheek needs more color, add a small amount and blend it carefully. Finish when the blush looks balanced with your eyes, lips, and overall base makeup.

Check both cheeks in natural light and soften any harsh edges for a balanced, natural finish.
Which Blush Formula Works Best?
The right formula depends on your skin, base makeup, and preferred finish. Each type can work well on a round face, so focus on the product that gives you the most control.
Liquid Blush for a Fresh Finish
Liquid blush can create a fresh, skin-like finish, although some formulas are more dewy than others. Highly pigmented products may deliver strong color with just one dot, so blend them promptly if they set quickly.
For liquid blush placement on a round face, begin near the upper cheekbone and blend toward the temples. A small, flexible brush can help control the direction, while a sponge can soften the color for a more diffused look.
Pay attention to how liquid blush sits over your base. Applying a wet formula over a heavy layer of setting powder may cause uneven blending or disturb the makeup underneath. Test the combination with a small amount before applying it to both cheeks.
Cream Blush for Easy Blending
Cream blush is useful when you want a soft finish with a natural-looking sheen. You can apply it with your fingertips or a brush, depending on the product’s texture. If using your fingers, gently tap the color into place rather than rubbing it across your foundation.
For a lifted appearance, keep most of the color along the upper cheekbone instead of spreading it across the full cheek. If your skin becomes shiny during the day, apply a little setting powder to areas that need it rather than covering the blush with a thick layer.
Powder Blush for Controlled Color
Powder blush is often convenient for beginners because the color can be built gradually. A fluffy brush creates a soft wash of color, while a smaller tapered brush helps you keep the application within a defined area.
Tap away excess powder before applying it, especially when using bright pink, coral, or berry shades. If you want to layer powder over cream blush, allow the cream to settle first and apply only a small amount of powder. Too many layers can make the cheek area look heavy or textured.

Compare liquid, cream, and powder blush to understand their textures, finishes, and application techniques.
Choosing a Blush Shade That Complements Your Skin
No single blush shade works best for every round face. Your skin tone, undertone, lipstick, eye makeup, and personal preferences all affect how a color looks. Testing the shade on your cheeks is often more useful than following strict rules about which colors suit particular complexions.
Pink and Rose for a Natural Flush
Soft pink and rose shades can create a fresh, natural-looking flush. Pale pink may look subtle on lighter skin, while deeper rose shades can provide more visible color on medium or deep complexions. The final effect also depends on the product’s pigmentation and how much you apply.
For everyday makeup, choose a shade that complements your complexion without overpowering the rest of your look. If the color appears too bright, try using less product and blending the edges before deciding that the shade does not suit you.
Peach, Coral, and Berry for Different Effects
Peach and coral shades can add warmth, while berry colors offer a richer, more noticeable finish. Terracotta can work well with warm-toned makeup, especially when paired with brown lipstick or bronze eyeshadow.
These shades can suit different skin tones when their depth and intensity are appropriate. A sheer berry blush may create a subtle flush, while a strongly pigmented peach shade can look bold. Start with a small amount and build the color until it complements your overall makeup.
Match the Color to Your Makeup Style
A soft blush often pairs well with natural foundation, light eye makeup, and a neutral lip color. For a more dramatic look, you can choose a deeper shade or increase the intensity while keeping the edges blended.
Consider the balance of your whole face. If you are wearing bold lipstick or smoky eye makeup, a restrained cheek color may help keep the look harmonious. For minimal everyday makeup, a little extra blush can add warmth without requiring contour or bronzer.
Working With Contour and Bronzer
Blush, contour, and bronzer have different purposes. Blush adds color, contour creates the appearance of shadow and definition, and bronzer adds warmth. Understanding these differences can help you avoid an overly heavy cheek look.
Position Blush Above the Contour
If you use contour, apply it beneath the cheekbone and keep most of your blush slightly above it. Blend the edges so the products transition smoothly without creating separate, visible stripes.
Strong contour is not necessary for a lifted blush effect. If you prefer a simple routine, skip contour and focus on placing the blush along the upper cheekbone. This can provide enough dimension for everyday makeup without adding several layers of product.
Add Bronzer for Warmth
Bronzer is commonly applied around the outer forehead, temples, and other areas where you want a sun-kissed effect. When using it with blush, keep the cheek area balanced so the warmth of the bronzer does not overpower the blush color.
Use a soft brush and apply bronzer gradually. If your cheeks begin to look muddy or you can see separate bands of color, blend the edges with a clean brush. You may find that blush and a small amount of bronzer are all you need.
Also Read : How to Apply Bronzer Correctly for a Balanced Makeup Look
Making Blush Last Longer
Blush can fade because of skin oils, humidity, rubbing, or the way different makeup formulas interact. A suitable base and careful application can help the color wear more evenly throughout the day.
Use Compatible Products
Choose a blush formula that works with your foundation and skin type. If you use cream blush, allow it to settle before applying any powder products over it. A thin layer of powder blush can help reinforce the color, but applying too much may make the finish look dry or textured.
Setting spray may also help your makeup wear more evenly, depending on the formula and your skin. Follow the product directions and allow it to dry without touching your cheeks. No setting method guarantees that blush will remain unchanged all day, so occasional touch-ups may still be necessary.
Refresh Faded Color Carefully
Before touching up your blush, check whether the color has faded or your skin has simply become shiny. If needed, blot excess oil gently with a tissue or blotting paper.
Apply a small amount of blush only where the color has faded. Blend the edges instead of covering the entire cheek again. This helps maintain the original shape and reduces the chance of creating a thick or uneven layer.
Common Blush Mistakes and How to Fix Them
If your blush does not look as expected, you may not need a different shade or formula. A small adjustment to the placement, tool, or amount of product can improve the result.
Concentrating Too Much Color in the Center
Applying a strong shade directly in the middle of the cheeks creates a more noticeable central flush. This can be a deliberate style choice, but it may not provide the lifted effect you want.
To soften the result, use a clean brush or sponge to diffuse the edges. If you prefer blush higher on the cheeks, gently blend some of the color toward the upper outer area without adding more product. Avoid dragging a large amount of pigment across the face.
Adding More Product Before Blending
Applying extra blush before the first layer is blended can make the color patchy or overly intense. Finish blending the initial application, step back from the mirror, and assess the result before adding more.
If the blush is already too strong, soften it with a clean brush or sponge. You can also gently press a small amount of compatible base makeup over an overly bright area, but avoid rubbing because this may disturb your foundation.
Choosing an Unsuitable Brush
The brush you use can affect how much color is deposited and where it goes. A dense brush may apply strong pigment quickly, while a large fluffy brush can spread the product over a wider area than intended. A small tapered brush offers more control when you want to keep the color close to the cheekbone.
Use light pressure and short strokes rather than pressing hard against the skin. For cream or liquid blush, a soft brush or makeup sponge can help blend the product without leaving obvious edges. If you are new to blush, choose a tool that makes it easy to apply a small amount and build gradually.
Frequently Asked Questions
1. Where should blush go on a round face?
For a lifted appearance, apply blush to the upper, outer part of your cheeks and blend diagonally toward your temples. Keep the strongest color near the cheekbones and soften the edges. You can adjust the placement to suit your features and preferred makeup style.
2. Should blush go on the apples of the cheeks or the cheekbones?
Both placements can work, but they create different effects. Blush on the apples gives a fresh, youthful flush, while higher placement along the cheekbones can create a more lifted appearance. Choose the position based on the result you want.
3. Does blush placement make a round face look slimmer?
Higher placement and outward blending can create the visual impression of lift and definition. However, blush does not change your actual face shape. The result depends on placement, color, lighting, and other makeup products, so focus on creating a balanced look rather than hiding your natural features.
4. Which blush formula is easiest for beginners?
Powder blush is often easy to control because you can build the color gradually with a brush. Cream and liquid formulas can also work well, although some are highly pigmented and require quick blending. Choose a formula that feels comfortable and is easy for you to apply evenly.
5. Which blush shade suits a round face best?
No single shade is best for every round face. Pink and rose shades can create a soft flush, peach and coral add warmth, and berry colors provide a richer finish. Choose a color that complements your complexion and overall makeup.
6. Can you use blush without contour or bronzer?
Yes. Blush can look balanced on its own, especially for everyday makeup. Apply it along your preferred cheek area, blend the edges, and adjust the intensity gradually. Contour and bronzer are optional rather than necessary.
7. How can you stop blush from looking patchy?
Prepare your skin, use compatible base products, and apply blush in thin layers. Cream and liquid blush may become patchy over a dry or powder-heavy base, while powder blush can cling to areas that are still wet. Make sure each layer is blended before adding more product.
8. How can you make blush last throughout the day?
Start with a suitable base and apply blush in a controlled layer. Avoid rubbing your cheeks, and consider layering compatible cream and powder formulas if that works with your skin and makeup. Blot excess oil before touching up and add only a small amount of color where needed.
Conclusion
The best blush placement for round face depends on the effect you want to create. Applying color along the upper cheekbones and blending toward the temples can give a lifted appearance, while a softer flush closer to the center of the cheeks creates a fresh, youthful finish. Neither approach is the only correct choice.
Choose a formula that works with your base makeup, select a shade that complements your complexion, and use a brush that gives you control over the application. Pay attention to your cheekbones and natural features instead of following a rigid placement rule. With thoughtful placement and careful blending, you can create a blush look that feels natural, balanced, and suited to your personal style.
Also Read : Best Hairstyles for Round Faces: Trendy Looks for 2026