

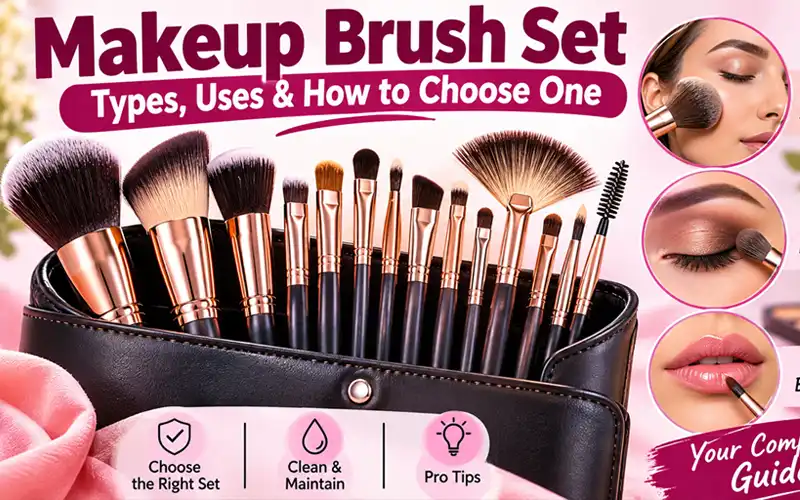
A makeup brush set is a group of brushes in different shapes and sizes, sold together as one collection, for applying and blending powder, cream and liquid makeup on the face, eyes and lips. Most sets also include a case, roll or stand. Sizes run from five brushes to thirty or more, and there is no standard for what a set must contain, so two sets with the same piece count can hold completely different shapes.
The short answer for beginners: five brushes (powder, foundation, blush, eyeshadow and blending) cover an everyday routine. The rest of this guide describes all 32 common brushes one by one, so you can judge any set by the shapes inside it instead of the number on the box.
How a Brush Behaves: Shape, Density and Fibre
Three traits decide what any brush does, and once you know them, every brush below makes sense.
Shape decides where the product lands. Flat and angled heads place colour precisely. Round and domed heads spread it across a wide area.
Density decides how much goes on. Tightly packed bristles pick up more product and give firmer coverage. Loose, fluffy bristles deposit less and blur edges.
Fibre decides which formula suits the brush. Synthetic bristles (nylon or Taklon) are smooth and non-porous, so they do not soak up liquids, rinse clean easily and suit creams and liquids. Modern synthetic grades handle powders well too, and vegan brushes are always synthetic. Natural hair (goat, pony, squirrel) has a textured surface that grips loose powder and diffuses it softly, but it absorbs liquids, takes longer to clean and costs more.
Check the build as well. A snug ferrule (the metal band) with no gaps keeps bristles from shedding, and a balanced handle gives control. The material of the handle matters far less than how it feels in your hand.
Face Brushes (1–12)
Powder Brush
A large, round, domed brush with soft, loosely packed bristles. It sweeps a veil of loose or pressed powder over the whole face to set foundation and concealer. Tap off the excess, then use light circular strokes, starting at the centre of the face and moving outward.
Pro tip: Press the brush into the powder instead of swirling it. You pick up less product, and the finish stays soft rather than cakey.
Foundation Brush
A flat, tapered, dense brush that spreads liquid or cream base in even strokes. The tapered edge reaches around the nose and the corners of the eyes. Dot the foundation on your cheeks, forehead and chin, then blend outward.
Pro tip: The centre of the face needs the most coverage and the edges need the least, so press harder at the centre and lighten your hand as you reach the hairline and jaw.
Kabuki Brush
A short, dense, rounded brush with a stubby handle. The tightly packed head buffs powder foundation and mineral powder into the skin in small circles, building coverage in controlled layers.
Pro tip: Dense bristles hold a lot of pigment, so start with a light dip and add a second pass only where you need it.
Stippling Brush
A brush with two fibre lengths: longer, thinner bristles over a dense base, ending in a fluffy tip. It dots and diffuses cream or liquid product into an airbrushed layer with no visible strokes.
Pro tip: Warm a little product on the back of your hand, then bounce the brush across your skin. Dragging it sideways leaves streaks, and pressing too hard leaves puddles of makeup.
Blush Brush
A small, domed, soft brush, stubbier than a powder brush so colour lands only where you want it. Smile to find the apples of your cheeks, then sweep the colour upward toward the temples.
Pro tip: Tap off the excess and test the shade on your hand first. Adding blush is easy, but removing it is not.
Contour Brush
An angled brush of medium density. The slanted edge follows the natural hollow under the cheekbone, so it draws a clean line of shadow with little effort. Sweep from the ear toward the corner of the mouth and stop around the middle of the cheek.
Pro tip: Choose a matte shade only one or two tones deeper than your skin, then blend the edges with a fluffy brush such as the powder or bronzer brush.
Bronzer Brush
A large, rounded, fluffy brush. It spreads warmth over the places the sun naturally touches: the forehead, the tops of the cheeks and the jawline. Use a figure-three motion along the temple, cheekbone and jaw.
Pro tip: Bronzer goes on the high points of the face, while contour goes in the hollows. Mixing the two up is the most common reason a face looks muddy.
Highlighter Brush
A small, tapered, softly spread brush that deposits a delicate amount of shimmer on the tops of the cheekbones, the brow bone, the bridge of the nose and the cupid’s bow.
Pro tip: Apply highlighter after blush so the glow sits on top of the colour, and build it in thin layers. A second layer is easy, but a heavy first layer shows every pore.
Fan Brush
A flat brush with sparse, spread-out bristles. It deposits only a whisper of product, which makes it ideal for soft highlighter, and it sweeps away eyeshadow fallout.
Pro tip: Brush fallout down and away from the eye, not across it, so the powder does not smear into your base.
Concealer Brush
A small, flat, firm brush. The firm bristles press creamy product onto blemishes, redness and under-eye shadows, and the small size reaches the inner corners of the eyes and the sides of the nose.
Pro tip: Pat the concealer on and tap its edges. Dragging the brush across the skin lifts the foundation underneath.
Setting Brush
A small, fluffy, tapered brush that presses loose powder under the eyes and around the nose without disturbing the concealer beneath it. Pressing, rather than sweeping, helps prevent creasing.
Pro tip: Leave the powder to sit for a minute, then brush away what is left. The extra time lets it lock the concealer in place.
Nose Contour Brush
A slim, tapered brush that places a thin line of shadow along the sides of the nose to make the bridge look narrower. Use a cool-toned matte shade and blend the edges well.
Pro tip: Step back from the mirror. If you can still see the line from arm’s length, blend again until it disappears.

A visual guide to 12 common face makeup brushes, showing their shapes and names to help beginners understand their uses.
Eye Brushes (13–24)
Flat Shader Brush
A flat, dense brush with short, firm bristles. It picks up plenty of pigment and presses it onto the eyelid, so shadow looks bold and even rather than sheer. It is the main tool for solid lid colour, base shades and shimmer.
Pro tip: Apply a sticky eye primer first, then press colour on in two thin layers. Sweeping drags the shadow off instead of packing it on.
Fluffy Blending Brush
A soft, domed brush with loose bristles that move easily. Its job is to diffuse shadow through the crease so colours melt into each other without harsh edges. It is the brush that separates a quick eye look from a polished one.
Pro tip: Use small windshield-wiper strokes with very little pressure, and keep the brush moving. Staying in one spot creates a dark patch.
Crease Brush
A small, gently tapered brush that places colour in the fold of the eyelid and adds depth. The smaller head gives more control than a large blender, which helps most on hooded or smaller eyes.
Pro tip: Start at the outer third of the crease and work inward. The shade only needs light pressure, because you can always blend it further.
Tapered Blending Brush
A pointed, fluffy brush that is slightly longer than a standard crease brush. The tip concentrates shadow in the outer corner and crease, while the fluffy sides soften the edges. Many makeup artists treat it as the most versatile eye brush.
Pro tip: Use the tip in tiny circles to melt the line between two neighbouring shades. Reach for it whenever a transition looks stripy.
Pencil Brush
A narrow, pointed, dense brush. Its small tip smudges shadow along the lower lash line and concentrates colour in tight spots, such as the outer corner for a smoky effect.
Pro tip: Match the shade to your crease colour so the lower lashes look connected to the rest of the eye instead of outlined separately.
Smudger Brush
A short, firm, flat brush, often with a slightly angled edge. The firm head has enough grip to move thick, creamy product, so it softens pencil or gel liner into a smoky edge.
Pro tip: Work fast, before the liner sets. If it has already dried, press a dark shadow over it and smudge that instead.
Detail Brush
A tiny brush, flat or round. It places a dot of highlighter or pale shadow on the inner corner of the eye, which makes the eyes look brighter and more open. It also fixes tiny smudges and adds a spot of shimmer to the centre of the lid.
Pro tip: Put a small dot in the inner corner and another in the centre of the lid. Together they give a wet, reflective look.
Angled Shadow Brush
A slanted, firm brush. The diagonal edge defines the outer corner of the eye, where a darker shade adds depth and lift. It also draws a soft powder line along the upper lashes.
Pro tip: Place the tip at the outer corner and pivot inward, forming a sideways V, then blend upward into the crease.
Fine Liner Brush
A thin, pointed brush with a very narrow tip. It draws slim, precise lines with liquid or gel liner, or with wet shadow.
Pro tip: Rest your elbow on a table and draw short dashes along the lash line, then join them. One long stroke wobbles, but a row of dashes does not.
Angled Liner Brush
A slanted, compact brush. The diagonal edge makes winged liner easier, because the tip sits at the outer corner and the angle sets the direction of the wing. Gel liner works best, since it stays creamy long enough to shape.
Pro tip: Imagine a line from the outer corner of your eye to the end of your eyebrow. That angle is where the wing should point.
Brow Brush
A short, firm, angled brush that fills sparse areas with powder or pomade in short strokes that copy natural hairs. The stiff bristles give control, and the angle follows the arch of the brow.
Pro tip: Start the colour at the middle of the brow and keep the front lighter. A dark front edge is the quickest way to make brows look drawn on.
Spoolie
A brush with spiral or comb-style bristles, similar to a mascara wand. It lifts brow hairs into shape and softens excess product so the finish stays natural.
Pro tip: Brush the hairs up and outward before you fill, then run the spoolie through once more afterward to diffuse any hard lines.

A visual guide to 12 eye makeup brushes showing their different shapes and names for easy identification.
Lip and Specialty Brushes (25–32)
Lip Brush
A small brush with a flat or pointed head. It applies lipstick and gloss more precisely than a bullet or wand, and working the colour into the lips helps it last longer. Trace the edges with the tip and fill the centre with the flat side.
Pro tip: After applying, blot with a tissue, dust a little translucent powder over it, and apply a second coat to extend wear.
Retractable Lip Brush
A compact brush with a cap or slide-out mechanism that keeps the bristles clean, which makes it the easy way to carry lip colour in a bag for touch-ups.
Pro tip: Wipe the bristles on a tissue before you retract them. Leftover colour stains the inside of the cap and transfers to the next shade.
Lip Liner Brush
A thin, firm brush that outlines the lips with lipstick or liner and gives a crisp border that stops colour from feathering. It is easier to control than a pencil for a soft line, and it can subtly reshape the lips by drawing just inside or outside the natural edge.
Pro tip: Draw the centre of the cupid’s bow first, then work outward to each corner so both sides match.
Lash Comb
A short head with fine teeth. After mascara, it separates clumps and leaves a neater, longer-looking fringe.
Pro tip: Comb from root to tip while the mascara is still wet, and wipe the teeth clean after each use.
Pigment-Packing Brush
A short, dense brush that presses loose pigments, glitters and foiled shadows onto the lid with strong payoff and very little fallout.
Pro tip: Think of it as stamping rather than painting. Place the brush on the lid, press, lift, and repeat.
Dual-Ended Brush
A brush with a head at each end of the handle. A common pairing is contour on one end and highlighter on the other, which lets you shape and brighten the face with one tool and saves space in a travel kit.
Pro tip: Wipe the first end on a tissue before you switch, since the unused end can pick up product from your hand.
Mini Kabuki
A compact, dense, rounded brush. It works like a full-size kabuki but fits in a handbag, so it is made for midday touch-ups on the nose, forehead and chin.
Pro tip: Press the powder on rather than rubbing it in. Rubbing moves the makeup underneath, but pressing refreshes the surface only.
Mask Brush
A wide, soft, flat brush that spreads clay and gel skincare masks evenly, keeps your fingers clean and uses less product.
Pro tip: Rinse it straight after use. Dried mask residue is hard to remove and stiffens the bristles.

A visual guide to eight lip and specialty makeup brushes, showing their shapes and names for easy identification.
Which Brush Goes First: A Full-Face Order
The numbers refer to the list above. Doing eyes first means any fallout can be cleaned away before the base goes on.
- Eyes: flat shader (13) for the lid, crease brush (15) for depth, blending brush (14 or 16) to soften edges, then liner (21 or 22).
- Fallout: fan brush (9) to sweep stray shadow from the cheeks.
- Base: foundation brush (2), kabuki (3) or stippling brush (4), then concealer brush (10).
- Set: setting brush (11) under the eyes and powder brush (1) over the rest of the face.
- Sculpt and colour: contour brush (6), bronzer brush (7), then blush brush (5).
- Glow: highlighter brush (8) last on the face, so it sits on top of everything else.
- Finish: brow brush and spoolie (23, 24), then lip brush (25).
When a Sponge or Silicone Blender Beats a Brush
Sponges and silicone blenders are not brushes, but many routines use them alongside one. A damp makeup sponge presses foundation and concealer into the skin with soft dabbing motions, and its pointed tip handles small areas such as the cupid’s bow. A silicone blender does not absorb any product, so none is wasted, but it works best with tapping motions, since swirling can smear makeup. Neither replaces a powder or eye brush, so treat them as extras rather than substitutes.
Labelled Sets
A makeup brush set with labels marks each tool by number, name or colour, which takes the guesswork out of learning shapes. Labels may sit on the handle, on a printed card in the packaging, or on the sleeves of a roll case.
Printed labels fade with washing. If yours do, put a strip of masking tape or a dot of permanent marker on each handle, or keep a phone note that pairs each number with its task. Pick one system and stick with it, so reaching for the right brush becomes automatic.
Cases, Rolls and Holders
A makeup brush set with a case solves storage and travel at once. A soft roll has an individual slot for each brush and packs flat. A hard case protects against crushing, which suits frequent travellers. An upright holder keeps brushes visible on a vanity.
Match the format to the set. A case built for twelve brushes struggles with twenty, and an over-stuffed case bends bristles out of shape. Store brushes head-up and completely dry, and keep the case out of steamy bathrooms.
Morphe Sets Explained
Morphe is a cosmetics brand widely known for its brushes, and its sets are a common reference point when people discuss accessible collections. Its range has included compact face sets, such as a four-piece blending kit, as well as mid-sized collections of around eight brushes covering face and eye work. Its brushes are generally described as soft, dense and synthetic, and some lines use bristles infused with silver ions to limit odour.
Product names, piece counts and availability change often, so check the current listing for exact contents. With any brand, compare the brushes against the 32-brush list above and ignore the marketing name. Brands label their shapes differently, but the underlying shapes of flat, domed, tapered and angled stay the same.

A visual guide to makeup sponges, silicone blenders, labelled brush sets and different ways to store makeup brushes.
How to Choose the Right Set
The best set is the one that matches your routine, skin and budget. Use these three sizes as a starting point:
- Starter (5–8 brushes): powder (1), foundation (2), blush (5), flat shader (13), blending brush (14), and optionally concealer (10) and crease (15).
- Everyday (8–12 brushes): the starter shapes plus contour (6), highlighter (8), angled liner (22) and brow brush (23).
- Pro or occasion (15+ brushes): a full range of face, eye and lip shapes, with duplicates of the brushes you use most so one can dry while the other is in use.
Any brush you cannot link to a step in your routine is probably surplus, so count your steps before you count pieces. Also ask whether you mainly use powders, creams or both, whether you travel with your makeup, and whether your skin is sensitive.
Price gives clues. Budget sets often offer many pieces with lighter handles and some shedding in the first washes, which makes them a low-risk way to find out which shapes you use. Mid-range sets usually have firmer ferrules, denser bristles and fewer, better-chosen pieces. Premium sets focus on hand-finished handles, finer fibre grades and precisely tapered heads, so their value depends on how often and how skilfully you use them.
In a store, test before you buy. Stroke the head across the back of your hand. It should feel smooth, spring back into shape and never scratch. Tug the bristles gently to check for shedding, look for gaps or visible glue around the ferrule, and make sure the case closes with every brush inside. Read the packaging for the piece count and bristle type instead of trusting the photo.
Washing and Replacing Your Brushes
Wash brushes every seven to ten days with a gentle cleanser such as baby shampoo or a brush soap. Swirl the bristles in lukewarm water, massage out the residue and rinse until the water runs clear, keeping water away from the handle. Brushes that handle liquids and creams hold residue longer, so wash them more often than powder brushes.
Reshape the head with your fingers and dry the brush flat, or let the bristles hang just over the edge of a counter. Drying a brush upright lets water seep into the ferrule and loosen the glue.
Well-kept brushes can last a year or more. Replace one when it sheds heavily, frays, loses its shape, will not wash clean or keeps an odour after washing. Sponges wear out faster, so replace them about every three months.
Four Mistakes That Spoil Good Brushes
- Loading too much product. Dip lightly, tap off the excess and build colour in thin layers.
- Pressing hard. Bristles are designed to glide across the skin, not scrub it.
- Mismatching brush and formula. A dense flat brush pushes loose powder around, and a fluffy brush soaks up liquid foundation.
- Skipping the blend. A few extra seconds with a clean, fluffy brush softens edges and makes a simple look polished. Check the result in natural light before you leave the house.
Frequently Asked Questions
How many brushes are enough?
One for each step in your routine, plus a spare for the product you use most.
Can one brush do everything?
A fluffy medium brush can cover powder, blush and bronzer in a pinch. Lining, brows and concealing tight areas still need their own shapes.
Do I need natural-hair brushes?
No. Synthetic fibres now handle powders as well, they are easier to clean, and they are vegan.
Is an expensive set worth it?
Only if you will use it often and look after it. A well-washed budget brush outperforms a neglected premium one.
Can I use the same brush for different products?
You can, but wash it between a cream and a powder, or the two will mix and turn patchy.
Should I share brushes?
No. Shared brushes can pass bacteria and viruses between people, including those behind pink eye and cold sores, so keep eye and lip brushes strictly personal.
Final Thoughts
A brush set pays off when each piece has a job in your routine. Use the 32-brush list as a reference instead of a shopping list, start with the shapes you will actually reach for, and let the rest of your collection grow with your skills.
Also Read : How to Clean Makeup Brushes at Home Without Damaging the Bristles