
Open almost any makeup bag and you will find two brown products that look nearly identical in the pan. One is bronzer, the other is contour, and plenty of people use them as if they were the same thing. They are not.
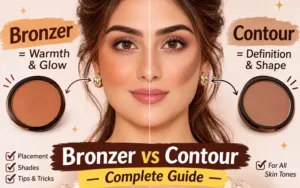
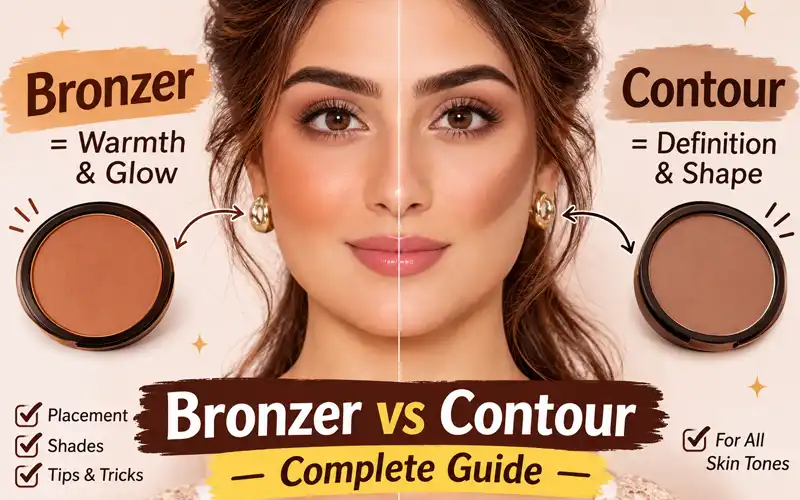
So, what is the difference between bronzer and contour? Bronzer adds warmth so your skin looks sun-kissed, while contour adds shadow so your features look more defined. This guide covers undertones, placement, skin tones, highlighter, palettes, and the small mistakes that ruin a good blend.
Whether you just bought your first palette or have been blending for years, knowing which product does which job saves money, time, and a lot of muddy cheekbones.
Bronzer Explained
Bronzer is a warm-toned face product made to copy the glow you get after a few days in the sun. Its job is to rescue skin that looks flat, pale, or tired under indoor lighting, not to change the shape of your face.
Because it simply adds healthy color, bronzer can be worn alone. On lazy days a quick sweep across the face is often the only product people need, and it still looks finished.
It is also forgiving. A slightly uneven application still reads as a natural tan, which makes bronzer a friendly first step into cheek color. The result is a face that looks rested rather than made up.
Contour Unpacked
Contour is a shading product. It creates the illusion of natural shadows so that certain features look sharper, slimmer, or more lifted. People reach for it when they want higher-looking cheekbones, a slimmer nose, or a crisper jawline.
On its own, a stripe of shadow can look flat or gray, which is why contour is usually paired with warmth. When it is done well the effect is subtle, and the skill lies in the blending far more than in the product. Think of it as editing your face with light rather than painting something onto it.
Also Read : Nose Contour Guide for Beginners to Achieve a Naturally Sculpted Look
Side-by-Side Comparison
Here is the difference between bronzer and contour at a glance.
| Feature | Bronzer | Contour |
| Undertone | Warm (golden, peach, caramel) | Cool or neutral (taupe, greige) |
| Finish | Matte, satin, or shimmery | Almost always matte |
| Shade depth | Close to a natural tan | About two shades deeper than your skin |
| Strength | Soft and diffused | Focused and defined |
| Looks like | A suntan | A natural shadow |
Undertone is the detail that separates them most. Warm browns read as sunshine, while cool and neutral browns read as shade, because real shadows are never orange. That is why testing a shade on your jawline tells you more than judging it by the pan.
Texture adds to the confusion. Both products come in powder, cream, and liquid versions, so the formula never reveals the purpose; only the shade does.
Before you pick up a brush, ask one question: do I want to look warmer, or do I want to look more defined? Your answer points to the right product, and the sections ahead show you how to use it.
Undertone Check
Choosing shades gets easier once you know your undertone, the subtle tint beneath the surface of your skin. Look at the veins on your inner wrist in natural light: green veins usually point to a warm undertone, blue or purple veins suggest a cool one, and a mix of both suggests neutral.
Jewelry gives a second clue. If gold flatters you most, you are likely warm; if silver does, you are likely cool; and if both look good, you are probably neutral. Warm and neutral skin pairs well with golden bronzers, while cool skin looks best in a rosier or more neutral bronze.
Where Each One Goes
Sun-Hit Zones
Bronzer and contour placement gets easier when you think about the sun. Bronzer belongs where the sun hits first: the tops of the cheekbones, the center of the forehead near the hairline, the bridge of the nose, and a light touch on the chin. Start at the temples and sweep inward so the color does not pile up in the middle.
Shadow Zones
Contour belongs where light does not reach. Begin in the hollow under the cheekbone, starting near the ear and stopping before the middle of the cheek. Add short strokes down the sides of the nose, under the jaw, and along the hairline if your forehead is broad. Gently suck in your cheeks to find the hollow, and check your profile in a side mirror, because contour has to look right from the front and the side.
Zones That Need Care
The two products meet along the cheekbone, so leave a small gap between them and blend the edges together. Bronzer should never go into the hollows, since it would fill the very shadow you just made. Keep heavy contour away from the apple of the cheek, the tip of the nose, and the under-eye area. If you wear glasses, go lighter near the nose so the frames do not smudge it.
Brushes and Sponges
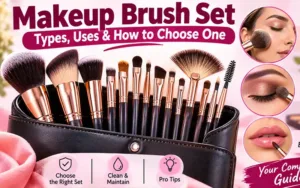
A few simple tools make both products easier to place. For powder bronzer, use a large, fluffy brush so the color spreads like a haze instead of a stripe. For powder contour, a small angled or dense brush puts the shadow exactly where you want it without scribbling.
Creams and liquids behave differently. A damp sponge presses them into the skin and blurs the edges quickly, so the color looks like part of your skin and not a layer on top. Clean fingertips also work well for cream bronzer, since body heat helps it melt in.
Keep one clean, fluffy brush just for blending where the two products meet, which keeps the transition seamless. A tiny brush suits the nose, while a larger one suits the cheekbones.
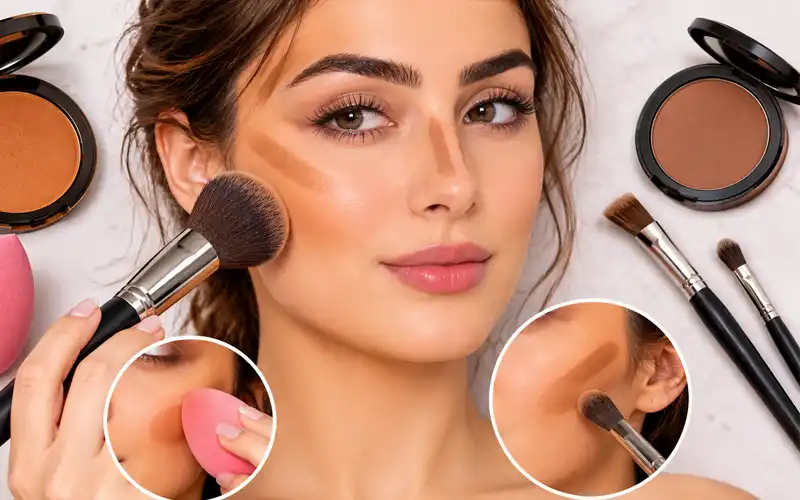
Different makeup brushes and sponges help apply and blend bronzer and contour smoothly.
Fair Skin Guide
Fair skin shows every shade mistake quickly, so the difference between bronzer and contour matters even more here. Fair complexions have less natural depth, which means both products need a softer tone and a lighter touch.
Choosing Shades for Fair Tones
For contour, look for ashy beige, light taupe, or soft greige that sits only slightly deeper than your skin; anything darker will look like a smudge, not a shadow. For bronzer, choose pale sandy, soft peach, or light beige with a hint of warmth.
Avoiding the Orange Trap
The classic fair-skin problem is color that turns orange or muddy. A shade that looks pretty in the pan can look far stronger on a pale face, so work slowly. Check your face in daylight by a window, since bathroom lighting hides patchy color. If you overdo it, buff the area with a clean, dry brush.
Medium to Deep Skin
Deeper complexions face the opposite problem: shades that are too light or too gray turn chalky. Medium skin suits contour in soft brown or mushroom tones, while deep skin suits rich espresso, mocha, or walnut. Avoid anything with an ashy cast, which can leave a gray film.
For bronzer, medium and olive tones look best in balanced copper, honey, or terracotta, and olive skin can also carry a touch of red. Deep skin shines in chocolate, bronze, or warm brown shades, and a fine, soft shimmer often looks lovely there.
Highlighter Joins the Party
Highlighter is the third member of this trio. It is a light-reflecting product, usually pearly, champagne, or golden, that makes chosen spots on your face glow.
Together the three make a simple recipe for depth: shadow in the hollows, warmth across the middle, and light on the peaks. A face with only one of them can look one-note, though you never need all three at once. Each product also has its own warning sign when it is overdone:
| Product | Sign you used too much |
| Bronzer | Skin looks dirty or heavy |
| Contour | The face looks striped or gray |
| Highlighter | Skin looks oily or glittery |
Shade matters here too. Soft champagne and pearl suit fair skin, warm gold flatters tan and deep skin, and a rosy sheen suits cool undertones.
Warm Versus Shine
Bronzer vs highlighter is a common mix-up because both can carry shimmer. The difference is purpose. Shimmer in a bronzer is there to add a little glow to warmth, while a highlighter exists purely to reflect light. Bronzer lives in the tan family, and highlighter lives in the pearl, champagne, and gold family, so check whether a shade is brown or pearly.
In effect, bronzer settles an area and highlighter pushes it forward. Bronzer makes a spot look deeper and more grounded, while highlighter makes it look rounder and more raised.
So which should you pick? Choose bronzer when your skin looks pale or flat and you want an all-over warm tone. Choose highlighter when your skin already has enough color and you only want a fresh, lit-from-within shine. On days you want both, keep the shine to the very top of the cheekbone and let bronzer cover the rest.
Which Looks More Natural?
Is bronzer or contour better for a natural look? Most of the time, bronzer wins. It is soft by design, it blends into skin easily, and a light dusting rarely looks like makeup. Think of bronzer as a filter and contour as an edit.
Contour can still look natural with a shade barely deeper than your skin, a very small amount, and a soft brush. A matte finish helps, since sparkle gives the game away. The goal is for people to notice a fresh, balanced face, not drawn-on shadows.
Pick bronzer for office days, school runs, and casual outings. Save stronger contour for photos, parties, and weddings, where a soft shadow helps your features show up on camera. If you cannot decide, begin with bronzer and add a whisper of contour only where you need it.
Does Brontouring Work?
Yes, you can use bronzer as contour, and the trick even has a name: brontouring. It works best with a matte, neutral bronzer that is not too orange or red, because that creates a soft, warm shadow that looks very natural. Many makeup artists use it as a shortcut because it saves time and keeps the face gentle.
The catch is undertone. A warm, sparkly bronzer in the hollows of your cheeks can look muddy, glittery, or like a patch of orange. If your bronzer has any shimmer, keep it for the high points and use something flatter to sculpt.
Be realistic about the result. Brontouring gives gentle shape, not sharp definition, so a dramatic jawline or strongly carved cheekbone still calls for true contour. If the result looks too strong, soften it with a dab of concealer and blend again.
Palettes for Both Jobs
A bronzer and contour palette puts matched shades in one compact, so you never have to guess whether two separate products will work together. Because the shades share a family, they blend into each other smoothly, and one mirrored case replaces a small pile of products when you travel.
When shopping, look for at least one cool matte shade for contour and one warm shade for bronzer; a lighter third shade for highlight is a bonus. Make sure the range suits your depth, since a palette built for light skin will not serve a deep complexion, and the reverse is also true.
Using the pans is simple: the deepest cool shade is for contour, the medium warm shade is for bronzer, and the lightest is for highlight. Swirl your brush lightly, because palette powders are often highly pigmented, and check the lid chart before you start.
Prep Comes First
A smooth base makes every blend easier. Moisturize first so powders do not cling to dry patches, and let skincare sink in for a couple of minutes, since damp skin makes cream products slide. Use a primer only if you need extra grip or a softer finish.
Foundation and concealer come next, and they should be even before any shaping begins. Color placed over uneven skin or a half-blended base tends to look patchy, so spend an extra minute on your complexion and the rest follows.
Layering in Order
Once your base is ready, apply contour first, then bronzer, then blush, and finish with highlighter. Contour builds the structure, bronzer lays warmth over it, and the rest adds color and light.
Formula order matters too. Cream and liquid products go on before powders, because powder blends smoothly over cream, but cream tends to drag and patch over powder. If you use only powders, simply follow the same sequence.
Always blend upward and outward, never downward, since downward strokes drag the face and make it look tired. Use soft circles where the shades meet so they melt together. Finally, step back and check the whole face from arm’s length; if you cannot see where one product ends and the next begins, you have blended well.
Slip-Ups Worth Fixing
A few small habits can spoil an otherwise good blend. The first is leaving hard edges; if you can see where a product starts, keep blending until the line fades. The second is dirty brushes, which carry old color and turn fresh shades muddy, so wash them every week or two.
The third is stopping at the jawline. If your face is deeper than your neck, the color looks like a mask, so blend a little down into the neck. The last is skipping the setting step; a light veil of translucent powder or a setting mist helps everything last through the day.
Formula by Skin Type
Your skin type decides which formula behaves best. Oily and combination skin usually do better with powders, which absorb shine and last longer; look for a matte or soft-satin finish so the color does not slide.
Dry and normal skin tend to love creams and liquids, since they melt in and leave a fresh, hydrated finish. Stick formulas sit in between and are the easiest to place.
Mature or sensitive skin often looks best with lightweight creams that do not settle into fine lines, and any new product should be patch tested first if your skin reacts easily.
Frequently Asked Questions
Should beginners buy both?
Not at first. Start with the product that matches the look you want most, then add the second once blending feels comfortable. Most beginners find bronzer easier, because small mistakes show less.
Is blush a substitute?
Not really. Blush adds a flush of pink, coral, or red, so it cannot create a tan or a shadow. It works as a finishing touch on top of bronzer and contour, not as a replacement.
How much product is enough?
For creams, a pea-sized amount per side of the face is plenty to begin with. For powders, one swirl and a gentle tap of the brush per cheek is enough.
When to skip contour?
Skip it when your base is a sheer skin tint, because a strong shadow looks disconnected from such light coverage. It is also smart to skip it when you are wearing a bold eye or lip look, since softer cheeks keep the focus where you want it.
Can eyeshadow work as contour?
Yes, in a pinch. Choose a matte shade in the taupe or soft brown family, apply it with a small brush, and use a very light hand, since eyeshadow is often more pigmented than contour products.
Will face shape change placement?
Slightly. A round face often looks more structured with contour angled up toward the ear, a long face looks balanced with bronzer swept across the forehead and chin, and a square face looks softer with light shading at the jaw corners.
Why choose a lighter shade in winter?
Less sun means your natural color is paler, so a bronzer closer to your own skin tone looks more believable. Use a smaller amount too, since heavy bronzer on pale winter skin looks obvious very quickly.
Final Takeaway
The easiest way forward is to start with one product, learn to blend it well, and add the second when you feel ready. Match every shade to your undertone, keep your touch light, and treat highlighter as an optional extra rather than a requirement. With a little practice, choosing between bronzer and contour stops being a question and becomes a habit.
Also Read : How to Apply Bronzer Correctly for a Balanced Makeup Look